App Installation Guide
Installing Flutter
The F-sektionen app is made with Flutter and Dart, so to get up and running we need to install the Flutter. Follow the links below and install the software if you haven’t done so already.
Flutter SDK download - Download the correct version (3.35.4) for the correct OS.
Further installation instructions - Select your OS, then select Android. Don’t install android studio just yet, we’ll do that in the next step.
Follow all the steps to install Flutter in the guide above.
Try to run:
flutter --version
This might take a bit to give output the first time, try restarting if it takes too long. If this doesn’t work it is probably because your computer cannot locate the necessary files to run Flutter.
This can be fixed by making a directory where you put your installed programs and then add:
export PATH="$PATH:$HOME/path-to-directory/flutter/bin"
to your paths. On Ubuntu you will probably want to run the following, which differs from the command in the official guide:
echo 'export PATH="~/path-to-directory/flutter/bin:$PATH"' >> ~/.bashrc
Now it should work (check the step above again). If you have not already installed it, we recommend using VSCode as your IDE.
Installing Android Studio
For development on App2, quite a few installments are needed and Android Studio is one of them.
In this app you can both get necessary SDK:s if something goes wrong and get different Android Emulators for much easier development.
To find the different emulators go to: Projects → Press the 3 dots in the right upper corner (or click “more actions”) → Press Virtual Device Manager → Add whichever emulator you want.
On linux, you probably also want to go to the SDK manager → SDK tools → Check and install android sdk command-line tools.
Installing Xcode (macOS only)
Sadly, if you are using macOS you also need Xcode which can be install through App Store which should be pretty straight forward. You will probably never open this app but it is necessary for the App2 stack to work.
Setting up Git
We need to configure Git if you have not used it before. Run:
git config --global user.name "Firstname Lastname"
git config --global user.email email@example.com
using the same email as your account on GitHub.
We also recommended you to run the following command to simplify your pushes to git:
git config --global push.default current
Cloning the Github repository
If you have never done this before, don’t worry, it’s fairly simple. You first need to navigate to your desired project location with the cd (change directory) command in the command line:
cd <preferred project folder>
Then, when use the clone command with git, which downloads or clones the project from our repository on Github. So, we need to run:
git clone https://github.com/fsek/App2.git
If you’ve done everything correctly you should see it start downloading files. After it’s done you should have a new App2 folder containg all the project files in the directory you chose.
Installing the environment
The first thing we need to do after cloning the project is to install the environment. First, enter the app directory with:
cd App2
To start off, check that:
flutter doctor
Looks like this: (MacOS but similar on Windows and Linux)
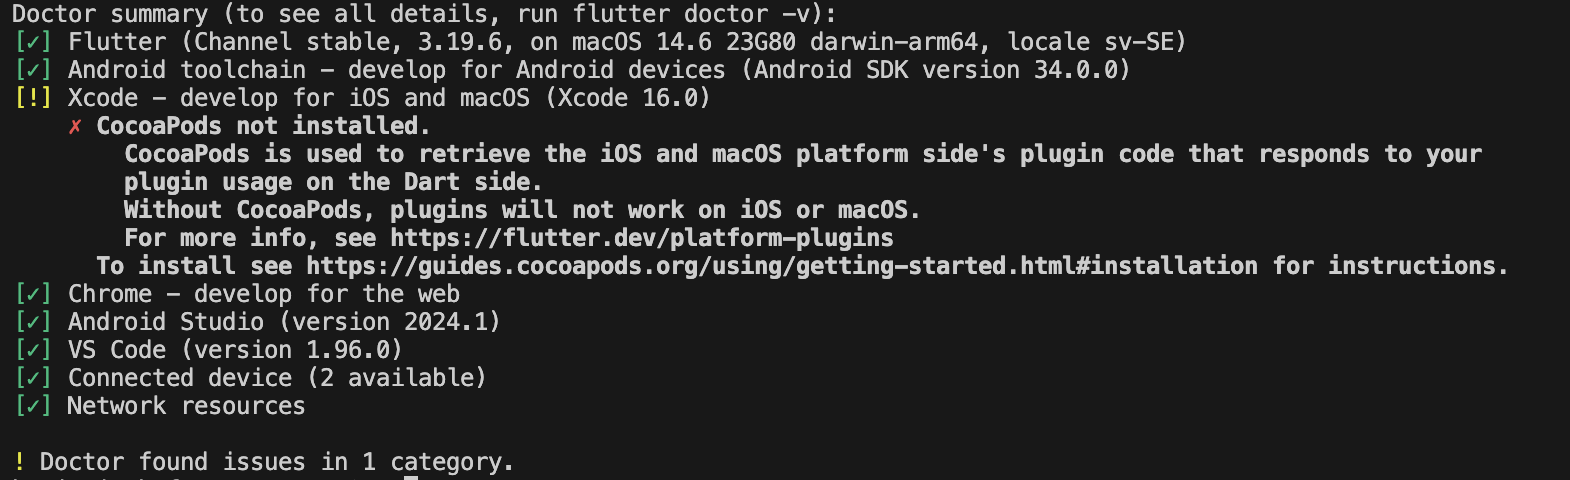
This should only need to be run the first time and never again (mostly). Try fixing whatever errors appear. You can safely ignore errors related to Chrome.
Now run:
flutter pub get
In the root of your program.
After this run:
flutter build apk
This may or may not work but it is most of the time not vital for the process to work.
Lastly run the magic command:
flutter pub run build_runner build
Running the App
The app automatically points to stage.fsektionen.se, so you don’t have to run your own backend. If you have not already, download VSCode and open the App2 folder in it.
You will also want to install the flutter extension. After running the commands above you should start a emulator to see what is happening. You can click the No Device button and choose one. If you don’t have any good one installed you can look at Android Studio installment.